- Jun
- 1
Zelda: The Quilt-Along — The Red Darknut
Posted Monday, June 1st, 2015 in QAL | Tags: , quilt along, Zelda

Can you believe it? We’re starting on our SIXTH block of our Zelda: The Quilt-Along. As a reminder, our full list of fabric and tool requirements are located here, which includes yardage for fabric for the entire quilt. For this particular block, you’ll need the following fabrics and supplies:
Fabric & Thread Requirements
| Black Kona: Black |
White Kona: White |
||
| Yellow-Orange Kona: Cheddar |
Red Kona: Red |
||
| Interfacing Pellon 911FF |
Thread White Thread |
Tools Needed for this Block
- Pressing Iron (Recommended: Smaller, travel iron)
- June Tailor Shape Cut (Optional) or other tool(s) to cut 1.5″ squares of fabric
- OLFA Rotary Cutter
- Pressing Board & Grid (learn how to make our Pressing Board & Grid here)
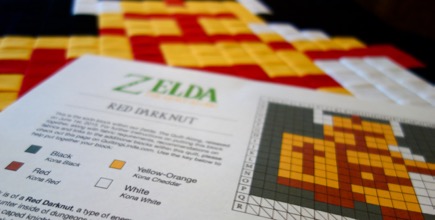
And finally, make sure to download our complimentary pattern for The Red Darknut:
Our Sixth Block: The Red Darknut
The sixth block that we will be making is The Red Darknut, a type of enemy that Link would encounter inside of dungeons within the game. Darknuts essentially are caped knights, carrying a shield in front of them that prevents Link from doing any damage to them head on and a sword used to attack. In order to attack a Darknut, Link must quickly attack them with his sword from behind. Red Darknuts are slightly easier enemies than the Blue Darknuts, who move much more quickly and deal more damage to Link when they hit him with their sword.
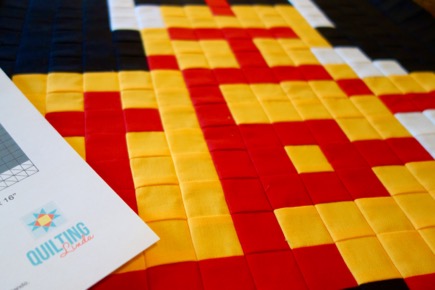
The Red Darknut will be constructed in the same manner as the other blocks, The Candle, The Fairy, The Key, The Bomb and The Blue Wizrobe, however the size is different. The Red Darknut block grid is 18 squares across and 16 squares down and it uses the following number of 1.5 inch squares:
| Color | Usage in this Block | Squares Needed | |
| Black Kona: Black |
Background of the block | 122 | |
| Yellow-Orange Kona: Cheddar |
The main part of the Armor and Shield | 78 | |
| Red Kona: Red |
Features on the Armor, Shield and Sword | 60 | |
| White Kona: White |
The sword and part of the helmet | 28 |
The Interfacing
The fusible interfacing is cut 27” wide by 24″ long. It will be a rectangle that covers Blocks A1 through P18 on our Grid. Remember to place your interfacing with the fusible side up.
Cutting Our Fabric
Cut your fabric into 1.5″ squares using the totals specified above for The Red Darknut block. To find an easy guide on how to cut out a large amount of squares at once, follow our instructions using the June Tailor Shape Cut Ruler in The Fairy block post.
Laying Out Our Fabric
To make The Red Darknut block, you will be placing the correct color fabric square on the fusible side of the interfacing following the pattern for The Red Darknut, which can be found here. The numbers and letters on your grid will correspond with the numbers and letters on each block’s pattern. You can download the pattern which contains the layout of the individual squares for The Red Darknut (Block 6) here.
Additional Steps
Further information and photos for these additional steps can be found within our first block’s instructions (located here at The Candle) but we included a quick recap below just for your review.
1. Press the Block: When you have finished laying out the fabric squares on the interfacing, press them with an iron following the interfacing manufacturers instructions. To press, (pressing cloth is optional) carefully place the iron on each section of the block until you have fused all the pieces in place. (Tip: I use a small travel iron for this step.)
2. Sew the Block: Fold and press the block along the seam line ,where the pieces meet, across the width of the fabric. Use a scant 1/4 inch, sew next to the fold lines you just made. Snip the seam allowance through the interfacing where the squares meet, being careful NOT TO GO THROUGH THE SEAM.
This is optional but makes snipping the seams easier on hands. I would not buy it just for this quilt but if you have these snips, this is a good place to use them: Fiskars Soft-touch Spring Action Quilter Snips
Press the seam allowances for each row in alternative directions. Finally fold along the vertical rows and sew using a scant 1/4 inch.


Welcome to Quilting Linda
Within you'll find info about quilting, including my projects soon to be featured below, as well as tidbits about my friends & family. Enjoy!


 © 2009 Linda West