
- May
- 9
Women of the Bible – 17 & 18
Posted Wednesday, May 9th, 2018 in QAL, Quilting | Read More
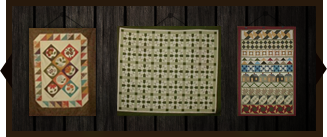
The newest blocks in the Women of the Bible series are quick and easy to sew. I chose to use less busy fabrics in these two blocks because some of the previous blocks are very busy.
Block 17 is named Jael. She and her husband hid a Canaanite military leader in their home. As he was sleeping, she killed him. Jael was declared a heroine for bringing down an enemy of Israel.

The 18th block in the series is Tamar. The story of Tamar can be found in Deuteronomy 25: 5-6.

The stories of some of these women of the Bible are quite shocking. They were heroines in their time but would be considered extremely inappropriate and even criminal by today’s standards.
The patterns for these blocks can be found at Prairie Quilt.


- Apr
- 21
Women of the Bible – 15 & 16
Posted Saturday, April 21st, 2018 in QAL, Quilt Blocks | Read More
The next two blocks for the Women of the Bible sew-along are Deborah and Miriam. Miriam was the sister of Moses. She hid him in a basket in the river when Pharaoh ordered the death of all male Hebrew babies. The name of the block used to represent Miriam is mosaic.

Deborah was a respected judge of Israel. The name of the block for Deborah is Courthouse steps. I may remake this block as I am not really happy with my fabric choises.

A link to these blocks can be found here.
- Mar
- 8
Zelda: The Quilt-Along — Sashing and Borders
Posted Tuesday, March 8th, 2016 in Quilting | Read More

If you have used interfacing in all of your blocks, you will need to use interfacing on the sashing and borders. The reason you will do this is because the sashing and borders will stretch more than the blocks and it will be difficult to keep it flat to quilt if it does not have interfacing.
Preparing and Cutting the Sashing and Borders
(Sashing = Strips of fabric that go between and around the blocks)
I cut a length of iron-on interfacing to fit the width (selvage to selvage) of the black and the green (Kiwi) fabrics. Press it onto the wrong side of the sashing and border fabrics.
After the interfacing is attached to the back of the fabric, cut 2 1/2 inch strips as follows for the sashing:
Green (Kiwi) = 7 strips
Black =12 strips
Assembling the Quilt Top
You have now assembled all your blocks and they are ready to be joined into sections using sashing strips between the blocks.
For the first section:
1. Sew the Key block to the top of the Candle block.
2. Sew the Fairy block to the top of the Bomb block.
We will join the two sections to the Link block by adding sashing to each long side of the of the Key/Candle block and the Fairy/Bomb block and sewing to the sides of Link.*
Helpful Hint: *Measure the length of the two sections and the Link block. If there is a large difference between the sections, you may need to add a piece to the shorter section. For example: If the Key/Candle block is 1 inch shorter than the Link block, cut a 1.5 inch strip of interfaced black fabric. (The half inch is the seam allowance.) Measure the width of the Key/Candle block (15.5)and cut the 1.5 inch strip that length – 1.5 X 15.5 inches.
Sashing will be added between the blocks in the middle and bottom sections of the quilt, using the same color fabric as the background in the blocks. Sashing will also be added all around the outside of each of the three sections. To do this, measure the length of each section and cut sashing to that measurement for the ends of the section. (It should be the same length as the sashing you added between the blocks.) Next measure the width of the entire section and sew a piece of sashing to the top and bottom of the section. Make sure each of the three large sections measure the same width.
When you have all three sections assembled, sew the sections together as shown above in the illustration of the quilt.
Adding the Border
(3 1/2 inch strips)
Green (Kiwi) = 8 strips
To make the border, I like to join all the strips end to end to make one long piece. Measure the length of the quilt top and cut 2 pieces that length. Sew one on each side of the quilt top. Next, measure the width of the quilt and cut 2 pieces that measurement. Sew to the top and bottom edge of the quilt.
Helpful Hint: If one piece is slightly larger than the other piece, place the larger piece on the bottom next to the feed dogs on the machine when you sew. This helps to ease the slightly different sized pieces together.
Congratulations! You have now finished the quilt top!
Quilt as desired.
I quilted my Zelda quilt on my short-arm quilting frame. Because of the thickness of the quilt top with all the seams and interfacing, I used a large needle in my machine and did a large meander design.
Binding
This is the only part of the quilt that will NOT have interfacing. I like to cut 2.5 inch strips and join them together with a diagonal seam. Use your favorite method of binding to finish your Zelda quilt.
- Mar
- 7
Zelda: The Quilt-Along — Tri-force
Posted Monday, March 7th, 2016 in Quilting | Read More
We are now ready to make Tri-force, the last block in the quilt-along This one is not made with a grid like the rest of the blocks. Because the previous blocks were made with interfacing, we will need to add interfacing to this block also.
You will need a ruler with a 60 degree line.
Before we cut out this block, we will apply iron-on interfacing to the back of the fabric as follows:
Apply interfacing to the wrong side of the Kiwi and the Canary fabrics.
Kiwi
2 pieces – 17 X 9 5/8
1 piece – 8 5/8 X 9 7/8
Canary
3 pieces – 8 5/8 X 9 7/8
We are now ready to cut the large triangles for the right and left sides of the Tri-force blocks using the (2) 17 X 9 5/8 pieces of Kona Kiwi with interfacing. IMPORTANT: These triangles MUST be cut one at a time because they are not the same.
Place your ruler on the diagonal on one piece from the upper left corner to the lower right corner and cut. We will only use one piece. You may discard the other half.
For the second triangle, cut from the upper right corner to the lower left corner. Again, we will use one piece and discard the other piece.
We have now cut the right and left pieces of the Tri-force block.
The center of the block has 1 Kiwi and 3 Canary triangles. Using the 8 5/8 X 9 7/8 interfaced fabrics, mark the center of each piece on one of the 9 7/8 inch sides. Line up the 60 degree line on the ruler with the bottom edge (9 7/8) of the fabric and slide the ruler until it is lining up the bottom corner of the fabric with the center mark on the top edge. Cut on this line. Turn the ruler around and line up and cut the other side to make a triangle. The cut triangle should measure 8 5/8 inches high by 9 7/8 at the base.
See the above picture and assemble the Tri-force block as follows:
Sew the Canary triangles to the right and left sides of the Kiwi triangle. Press seams toward the canary triangle. Sew the 3rd Canary triangle to the third side of the Kiwi triangle and press toward the Canary triangle.
The final step is to sew the large Kiwi triangle to the right and left sides of the Canary and Kiwi triangles that you just assembled. The unfinished* size of the Tri-force block is 18 1/2 X 16 1/2 inches, the same as the Sword and Shield and Bow and Arrow blocks. If your block is smaller than this size, you can add a strip of fabric to the top or bottom of the block to make it longer. and likewise to the sides, to achieve the desired size.
Helpful Hint: * Unfinished size is the measurement before the block is sewn onto the block or sashing next to it.
The final step to assemble the quilt block will be to make sashing and borders. This will be detailed in the next post.
- Nov
- 15
Zelda: The Quilt-Along — Link (Part 4)
Posted Sunday, November 15th, 2015 in QAL | Read More

For the second in a series of four blocks we are working on Link, with this being our eleventh block of our Zelda: The Quilt-Along. Find all of the blocks associated with Link here: Link (Part 1), Link (Part 2), Link (Part 3) and Link (Part 4). As a reminder, our full list of fabric and tool requirements are located here, which includes yardage for fabric for the entire quilt.
The eleventh block that we will be making is Link, who is a young swordsman who is asked, after rescuing Impa, the royal nursemaid, to save Hyrule and Princess Zelda from the evil Prince of Darkness, Ganon, who is seeking out the shards of the Triforce of Wisdom. Link collects the pieces of this Triforce and enters Ganon’s lair in Death Mountain. There he defeats Ganon with a Silver Arrow, secures the Triforce of Power, and saves Princess Zelda from Ganon’s clutches.
The Link block will be constructed in the same manner as the other blocks, The Candle, The Fairy, The Key, The Bomb, The Blue Wizrobe, The Red Darknut, Princess Zelda, Sword and Shield, and Bow and Arrow however the size is different. The Link (Part 4) block grid is 15 squares across and 16 squares down and it uses the following colors of fabrics:
| Light Green Kona: Sour Apple |
Brown Kona: Earth |
||
| Yellow-Orange Kona: Cheddar |
Black Kona: Black |
- Nov
- 10
Zelda: The Quilt-Along — Link (Part 3)
Posted Tuesday, November 10th, 2015 in QAL | Read More

For the second in a series of four blocks we are working on Link, with this being our eleventh block of our Zelda: The Quilt-Along. Find all of the blocks associated with Link here: Link (Part 1), Link (Part 2), Link (Part 3) and Link (Part 4). As a reminder, our full list of fabric and tool requirements are located here, which includes yardage for fabric for the entire quilt.
The eleventh block that we will be making is Link. Within each Zelda game there is an incarnation of Link, all of which share both physical and non-physical characteristics. The connection of all Link characters, whether they are the same character or an ancestor of Link is unknown. Link only speaks three times throughout all of the Zelda games and by gamers that enjoy the series, this is seen as a misstep. Not typically hearing Link’s voice allows gamers to immerse themselves and be Link.
The Link block will be constructed in the same manner as the other blocks, The Candle, The Fairy, The Key, The Bomb, The Blue Wizrobe, The Red Darknut, Princess Zelda, Sword and Shield, and Bow and Arrow however the size is different. The Link (Part 3) block grid is 15 squares across and 16 squares down and it uses the following colors of fabrics:
| Light Green Kona: Sour Apple |
Brown Kona: Earth |
||
| Yellow-Orange Kona: Cheddar |
Black Kona: Black |
- Nov
- 5
Zelda: The Quilt-Along — Link (Part 2)
Posted Thursday, November 5th, 2015 in QAL, Quilt Blocks | Read More

For the second in a series of four blocks we are working on Link, with this being our eleventh block of our Zelda: The Quilt-Along. Find all of the blocks associated with Link here: Link (Part 1), Link (Part 2), Link (Part 3) and Link (Part 4). As a reminder, our full list of fabric and tool requirements are located here, which includes yardage for fabric for the entire quilt.
The eleventh block that we will be making is Link, who interestingly enough often shares a lot of similarities to Peter Pan. He wears green clothing, has an elf-like appearance, hangs out with a Fairy and battles evil with a sword. In some games, Link even fights his shadow or dark self. The creator of The Legend of Zelda has revealed that he did indeed take inspiration from Peter Pan when creating our hero.
The Link block will be constructed in the same manner as the other blocks, The Candle, The Fairy, The Key, The Bomb, The Blue Wizrobe, The Red Darknut, Princess Zelda, Sword and Shield, and Bow and Arrow however the size is different. The Link (Part 2) block grid is 15 squares across and 16 squares down and it uses the following colors of fabrics:
| Light Green Kona: Sour Apple |
Brown Kona: Earth |
||
| Yellow-Orange Kona: Cheddar |
Black Kona: Black |
- Nov
- 1
Zelda: The Quilt-Along — Link (Part 1)
Posted Sunday, November 1st, 2015 in QAL, Quilting | Read More

After a little hiatus we are back and tackling the big man and main character of the Zelda Games, Link himself, in our tenth block of our Zelda: The Quilt-Along. As a reminder, our full list of fabric and tool requirements are located here, which includes yardage for fabric for the entire quilt.
The tenth block that we will be making is Link, our main hero and the character that is played by the individual gamer. Link is typically depicted as a young boy or teen in green clothing that is called upon to leave his home and save Hyrule (the world within our Zelda games) and Princess Zelda.
As Link is the main character of the Zelda games, we are making him significantly larger compared to the other items and characters on our quilt. For that reason, Link’s quilt block has been divided up into four separate blocks to be sewn together after they are individually completed. Find all of the blocks associated with Link here: Link (Part 1), Link (Part 2), Link (Part 3) and Link (Part 4).
The Link block will be constructed in the same manner as the other blocks, The Candle, The Fairy, The Key, The Bomb, The Blue Wizrobe, The Red Darknut, Princess Zelda, Sword and Shield, and Bow and Arrow however the size is different. The Link (Part 1) block grid is 15 squares across and 16 squares down and it uses the following colors of fabrics:
| Light Green Kona: Sour Apple |
Brown Kona: Earth |
||
| Yellow-Orange Kona: Cheddar |
Black Kona: Black |
- Aug
- 16
Zelda: The Quilt-Along — Bow and Arrow
Posted Sunday, August 16th, 2015 in QAL | Read More

Our next block includes two more of Link’s weapons, his Bow and Arrow, in our ninth block of our Zelda: The Quilt-Along. As a reminder, our full list of fabric and tool requirements are located here, which includes yardage for fabric for the entire quilt.
The Bow and Arrow is a combination that Link uses to defeat his enemies within the Zelda games. Link begins with just a sword and shield and eventually picks up other weapons including the bow and arrow to progress through the game. In the first Zelda game, the bow and a silver arrow is required to finish off Ganon, the main and last boss of the game.
The Bow and Arrow block will be constructed in the same manner as the other blocks, The Candle, The Fairy, The Key, The Bomb, The Blue Wizrobe, The Red Darknut, Princess Zelda and Sword and Shield, however the size is different. The Bow and Arrow block grid is 18 squares across and 16 squares down and it uses the following colors of fabrics:
| Green Kona: Kiwi |
Brown Kona: Earth |
||
| Yellow-Orange Kona: Cheddar |
Light Green Kona: Sour Apple |
||
| Light Gray Kona: Light Gray |
|||
- Aug
- 1
Zelda: The Quilt-Along — Sword and Shield
Posted Saturday, August 1st, 2015 in QAL | Read More

Our next block is two of Link’s weapons against evil, his Sword and Shield, our eighth block of our Zelda: The Quilt-Along. As a reminder, our full list of fabric and tool requirements are located here, which includes yardage for fabric for the entire quilt.
The Sword and Shield are two central pieces of Link’s weaponry within the Zelda games. Link begins each game with a Wooden Sword and Shield and can purchase a stronger Magical version of each. The Magical Sword and Shield were actually only used in the first two Zelda games. In newer Zelda games Link upgrades to the Master Sword, typically by finding it after defeating a particular part of the game.
The Sword and Shield block will be constructed in the same manner as the other blocks, The Candle, The Fairy, The Key, The Bomb, The Blue Wizrobe, The Red Darknut and Princess Zelda, however the size is different. The Sword and Shield block grid is 18 squares across and 16 squares down and it uses the following colors of fabrics:
| Green Kona: Kiwi |
Brown Kona: Earth |
||
| Yellow-Orange Kona: Cheddar |
Red Kona: Red |
||
| White Kona: White |
|||
- Jul
- 1
Zelda: The Quilt-Along — Princess Zelda
Posted Wednesday, July 1st, 2015 in QAL | Read More

We are finally hitting the namesake behind our Zelda Quilt-Along…Princess Zelda. We’re starting on our seventh block of our Zelda: The Quilt-Along. As a reminder, our full list of fabric and tool requirements are located here, which includes yardage for fabric for the entire quilt.
Princess Zelda, the princess that Link is attempting to rescue within the game as well as the namesake of the game itself. In every game of the Zelda series, Princess Zelda is captured or put in danger by evil forces — generally led by a villian boss named Ganon. It is up to Link to save her. Many people unfamiliar with the game series incorrectly refer to Link (who is the main character in the games) by the princess’ name “Zelda”, as they assume that the title of the game is referring to the main character and not the damsel in distress.
Princess Zelda will be constructed in the same manner as the other blocks, The Candle, The Fairy, The Key, The Bomb, The Blue Wizrobe and The Red Darknut, however the size is different. The Princess Zelda block grid is 18 squares across and 16 squares down and it uses the following colors of fabrics:
| Black Kona: Black |
Brown Kona: Earth |
||
| Yellow-Orange Kona: Cheddar |
Red Kona: Red |
- Jun
- 1
Zelda: The Quilt-Along — The Red Darknut
Posted Monday, June 1st, 2015 in QAL | Read More

Can you believe it? We’re starting on our SIXTH block of our Zelda: The Quilt-Along. We have our full list of fabric and tool requirements are located here, which includes yardage for fabric for the entire quilt..
The Red Darknut was a type of enemy that Link would encounter inside of dungeons within the game. Darknuts essentially are caped knights, carrying a shield in front of them that prevents Link from doing any damage to them head on and a sword used to attack. In order to attack a Darknut, Link must quickly attack them with his sword from behind. Red Darknuts are slightly easier enemies than the Blue Darknuts, who move much more quickly and deal more damage to Link when they hit him with their sword.
The Red Darknut will be constructed in the same manner as the other blocks, The Candle, The Fairy, The Key, The Bomb and The Blue Wizrobe, however the size is different. The Red Darknut block grid is 18 squares across and 16 squares down and it uses the following colors of fabrics:
| Black Kona: Black |
White Kona: White |
||
| Yellow-Orange Kona: Cheddar |
Red Kona: Red |
- Apr
- 30
Zelda: The Quilt-Along — Blue Wizzrobe
Posted Thursday, April 30th, 2015 in QAL | Read More

We are now ready to make the FIFTH block of our Zelda: The Quilt-Along. We have our full list of fabric and tool requirements are located here, which includes yardage for fabric for the entire quilt..
The Blue Wizzrobe was a type of enemy that Link would encounter inside of dungeons within the game. Wizzrobes shoot magic bolts at Link to hurt him and could disappear and reappear elsewhere, making them a tough enemy to kill. Blue Wizzrobes (as is shown in our block) are the most difficult type of Wizzrobes. They can fire continous spells at Link while they chase him around the room and can can cross areas that other Wizzrobes typically cannot.
The Blue Wizzrobe will be constructed in the same manner as the other blocks, The Candle, The Fairy, The Key and The Bomb, however the size is different. The Blue Wizzrobe block grid is 18 squares across and 16 squares down and it uses the following colors of fabrics:
| Black Kona: Black |
White Kona: White |
||
| Dark Blue Kona: Deep Blue |
Blue Kona: Lavender |
- Apr
- 15
Zelda: The Quilt-Along — The Bomb
Posted Wednesday, April 15th, 2015 in QAL | Read More

We are now ready to make the FOURTH block of our Zelda: The Quilt-Along. We have our full list of fabric and tool requirements are located here, which includes yardage for fabric for the entire quilt..
The Bomb was an item that Link would use to attack his enemies. He would find these items throughout the world or could purchase them from a character that sells helpful things. Link would set a bomb down near one of his enemies and quickly get away quickly or he would also be hurt by the explosion. Bombs are also used to get to new areas on the map of the game, which Link could access after blowing up specific rocks or doors.
The Bomb will be constructed in the same manner as the other blocks, The Candle, The Fairy and The Key, however the size is different. The Bomb block grid is 9 squares across and 15 squares down and it uses the following colors of fabrics:
| Black Kona: Black |
White Kona: White |
||
| Dark Blue Kona: Deep Blue |
Blue Kona: Lavender |
- Apr
- 1
Zelda: The Quilt-Along — The Key
Posted Wednesday, April 1st, 2015 in Quilting | Read More

Happy April’s Fools Day – but we aren’t fooling you! Yes that’s right, we’re ready to make the THIRD block of our Zelda: The Quilt-Along. We have our full list of fabric and tool requirements are located here, which includes yardage for fabric for the entire quilt..
The third block that we will be making is The Key, which was an item that Link could use to unlock doors within dungeons in the The Legend of Zelda game. Link would need to find the key before progressing through each dungeon, often right before facing the main enemy of the dungeon or “boss”. There were a total of eight dungeons within the first Zelda game.
The Key will be constructed in the same manner as the other blocks, The Candle and The Fairy, however the size is different. The Key block grid is 15 squares across and 15 squares down and it uses the following colors of fabric:
| Black Kona: Black |
White Kona: White |
||
| Yellow-Orange Kona: Cheddar |
Red Kona: Red |
- Feb
- 21
Zelda: The Quilt-Along – List of Fabric & Tools
Posted Saturday, February 21st, 2015 in Quilting | Read More
Are you ready for some Zelda? If you are a video game buff and this quilt is for you to keep, I can already imagine that you’re really anxious to see the design of our Zelda: The Quilt-Along quilt. If you’re making it for a friend or relative and they know about it, make sure to send them a link or a screenshot and let them know all about the really incredible quilt that you’re making for them. If you really want to make them excited, you can throw around some of the characters in it like Link, Princess Zelda, a Red Darknut, a Blue Wizzrobe and the Triforce. Finally, if you’re saving this quilt as a Christmas present for the video game buff in your life, just know that you are going to be bigger than Santa this year. Here it is:
Below are the fabric requirements for our Zelda: The Quilt-Along and some of the tools that I used to create the first Zelda quilt that you can see here on this post. Please note that some of the tools are marked as optional.
Fabric Requirements for Zelda: The Quilt-Along
| Color | Usage | Yardage | |
| Dark Green Kona: Kiwi |
Border, Binding and Block Background | 3 yards | |
| Light Green Kona: Sour Apple |
Link and Arrow | ¾ yard | |
| Black Kona: Black |
Border and Background | 3 yards | |
| White Kona: White |
Candle and accents in other blocks | 3 yards | |
| Yellow-Orange Kona: Cheddar |
Link, Darknut and other blocks | 3 yards | |
| Brown Kona: Earth |
Shield, Link, Bow, Zelda | 1 yard | |
| Red Kona: Red |
Zelda, Darknut and Others | ¼ yard | |
| Light Blue Kona: Lavender |
Wizzrobe and Bomb | ¼ yard | |
| Dark Blue Kona: Deep Blue |
Wizzrobe and Bomb | ¼ yard | |
| Yellow Kona: Canary |
Triforce | ¼ yard | |
| Gray Kona: Medium Grey |
Bow | ⅛ yard | |
| Interfacing Pellon 911FF (20 inches wide) |
Used as backing for all squares | 15 yards |
1. Quilting Fabric(s): Kona Cotton Solids – I used all Kona Cotton Solid fabrics. They are available at Fabric.com, Amazon.com and JoAnn Fabrics & Crafts (only some of the colors below are available here). I will give you the names of the fabric colors in the fabric requirement list. There are a couple colors that need a very small amount. You may want to check your scrap basket or buy a fat eighth or fat quarter. I will note this on the list.
All fabric for the blocks will be cut into 1.5″ squares. Please note that the fabric requirement list above includes yardage for sashing and borders. The sashing and borders will not be cut into squares. There is a notation above on the colors that will be kept back for sashing and borders.
2. Interfacing: Light Weight Fusible (Pellon 911FF) – I used a light weight fusible interfacing (911ff by Pellon) for the grid. You do not have to use interfacing but it speeds up the process and helps keep the squares in the correct order while sewing. I bought the thinnest interfacing I could find because it does add some bulk to the blocks.
Rather than buying more expensive interfacing with the grid printed on it, I made my own on white or cream duck fabric and simply laid the plain interfacing on top. It works just as well, as you can easily see through the interfacing to the grid below and it saved me quite a bit of money. I’ll be explaining how to make the grid on March 1st, along with how to make the first block.
Tools Needed for Zelda: The Quilt-Along
1. Notions: Rotary Cutter – To cut the fabric into 1.5″ squares, you will need a sharp blade in your rotary cutter. Now would be a good time to replace the blade before you begin cutting strips. To cut the squares, you will cut 1.5″ strips and then cross-cut the strips into squares. We recommend using both the OLFA 45mm Rotary Cutter and OLFA 60mm Rotary Cutter.
2. June Tailor Shape Cut Ruler (Optional) – In order to speed up the process, I used a June Tailor Shape Cut Ruler (find one here at Amazon.com). This allowed me to stack up to four layers of fabric at once and then cut several strips without moving the fabric. This is not necessary to complete the quilt blocks, but is a big time-saver and more accurate option. It is definitely a worthwhile purchase if you are intending on doing any other similar quilts or quilts in which you are cutting strips.
3. Fabric-Covered Board – You will need a board to use under the grid and also to layout and press the blocks. I went to Lowes and had them cut a 30-inch square from a MDF board. Rather then waste the remainder of the board, I had them cut the leftover piece into several smaller boards to share with a friend or use yourself. I used a scrap of batting for padding and covered the board with a piece of duck cloth. You could draw your grid directly on the covered board. I chose to use a separate piece of duck cloth for my grid. Again, I will be sharing how to make this grid on March 1st.
4. Container for Individual Squares (Optional) – A container to hold your cut squares is very useful. Any container will be fine. I used an empty square tupperware box.
These are all the tools (other than a sewing machine or needle and thread) that you need to make the blocks. The sizes of the blocks will vary according to their location in the quilt. Each month (or half month, in the case of the first few patterns) we will release a new pattern on my blog that will show a grid for all the squares and also give you a little information about what character, enemy or object from The Legend of Zelda video game that you will be making. Feel free to use this information to really tease that special someone about their new Zelda quilt!
- Feb
- 16
Coming Soon: FREE Zelda
Quilt-Along
Posted Monday, February 16th, 2015 in Quilting | Read More
In 2012 I made a “Zelda” quilt based off of an old Nintendo game, The Legend of Zelda. My daughter Jennifer designed it and I created it for my son-in-law (her husband) for Christmas. It was a big hit not only with my son-in-law, but with my website visitors as well — many of whom were interested in a pattern or tutorial on how to make it.

Now that I am living closer to my daughter, Jennifer and I have decided we can now put together a FREE quilt-along on the blog featuring Zelda. For this new project, which we are calling Zelda: The Quilt-Along, Jennifer has changed the design slightly from the quilt I originally created, making the new Zelda quilt smaller and changing some of the blocks. Zelda: The Quilt-Along will be starting March 1st, 2015 and will involve a new block each month, with a few of the first months featuring two smaller blocks twice a month. We’ll be providing not only a free design PDF each month, but will also provide helpful photos and tips that I learned along the way to really help streamline your piecing and make the entire process easier. We will finish up with our last block and finishing instructions in November, so this could be a great Christmas gift for the gamer in your life.
- May
- 18
Great Granny Squared Sew Along
Posted Sunday, May 18th, 2014 in Fabric Stash | Read More
I finished the Great Granny Sew Along quilt top today. All the fabrics for this quilt top came from my scraps and stash.
We were given our choice of two ways to finish the top. I chose Kim’s version. Both quilts used the same size pieces. The only difference is how they are sewn together.

I plan to put it on the quilt frame later this week or next week after Memorial Day.
- Apr
- 28
Great Granny Squared Sew Along
Posted Monday, April 28th, 2014 in Quilting | Read More
A new sew along began on April 21. We were away visiting our children and grandbabies for a few days and I didn’t start my first block until the end of the week. I finished my basket block on Sunday and cut out the yarn block too. On Monday I put the second block together. I have to admit, I didn’t know what the crochet hook block was until I read the blog. (I thought it was an arrow. lol)
I am using 1930’s reproduction fabrics leftover from the barn blocks I made last year. I may have to use a few fat quarters from my collection before this sew along is finished.
If you want to join the sew along, it can be found on the Jolly Jabber blog. There are two settings for the blocks. I plan to use the setting by Kimberly.

Basket block

Crochet hook and balls of yarn
- Apr
- 8
Quilty Fun Sew Along – The End!
Posted Tuesday, April 8th, 2014 in Quilting | Read More

The top is finished! The original pattern has another border. I decided to not put the last border on my quilt. I like that the pieced border is more prominent without another border on the outside edge.
I have enjoyed making this quilt entirely from my scraps. The white background came from my stash and scraps also.
I am going to use bleached muslin for the backing and a pieced binding on the finished quilt.
Lori Holt will host another sew along, Great Granny Squared, beginning on April 21 that will go for five weeks. We will be using her new book, Great Granny Squared as the manual for this quilt. The sew along is free but you will need the book for pattern instructions.

Welcome to Quilting Linda
Within you'll find info about quilting, including my projects soon to be featured below, as well as tidbits about my friends & family. Enjoy!

- Categories
- Accuquilt Go cutter
- Amy Butler
- baby quilt
- Bonnie Hunter mystery quilt
- Celtic Solstice
- Christmas gift
- Decorated Cookies
- Dots on Dots Blog Hop
- Embroidered Quilt Label
- Fabric Stash
- Fabrics
- Family
- Five Little Monkeys
- Gingerbread House
- Grand Illusion
- Heather Bailey
- Hello Moon Block of the Month
- Hello Sun Block of the Month
- jelly roll
- Layer Cake
- Magazines
- Moda charm pack
- Moda City Girl fat quarters
- My Projects
- mystery quilt
- Patterns
- Personal
- Piecemakers Quilt Group
- place mat
- QAL
- Quilt Blocks
- Quilt Classes
- Quilt Guilds
- Quilt Shows
- Quilting
- Quilting tools
- Scrap Quilts
- Sewing and Crafting
- Shop Hop
- table runner
- Tips and Tricks
- Twister quilt
- Twister Wreath
- Wall Hanging
- Websites
-
- By Date
- May 2019
- April 2019
- January 2019
- December 2018
- November 2018
- September 2018
- August 2018
- July 2018
- May 2018
- April 2018
- March 2018
- February 2018
- 2019
- 2018
- 2017
- 2016
- 2015
- 2014
- 2013
- 2012
- 2011
- 2010
- 2009

 © 2009 Linda West