
- Mar
- 15
Zelda: The Quilt-Along — The Fairy
Posted Sunday, March 15th, 2015 in Quilting | Tags:
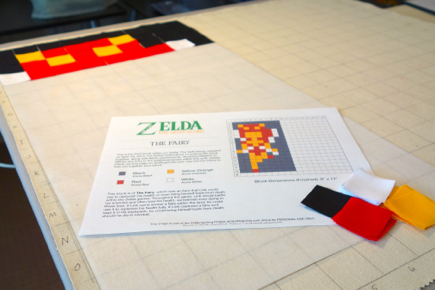
Are you ready to make The Fairy — the second block of our Zelda: The Quilt-Along? As a reminder, our full list of fabric and tool requirements are located here, which includes yardage for fabric for the entire quilt. For this particular block, you’ll need the following fabrics and supplies:
Fabric & Thread Requirements
| Black Kona: Black |
White Kona: White |
||
| Yellow-Orange Kona: Cheddar |
Red Kona: Red |
||
| Interfacing Pellon 911FF |
Thread White Thread |
Tools Needed for this Block
- Pressing Iron (Recommended: Smaller, travel iron)
- June Tailor Shape Cut (Optional) or other tool(s) to cut 1.5″ squares of fabric
- OLFA Rotary Cutter
- Pressing Board & Grid (learn how to make our Pressing Board & Grid here)
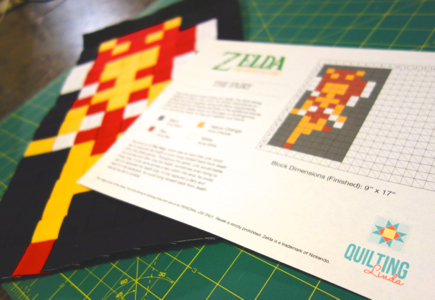
And finally, make sure to download our complimentary pattern for The Fairy:
Our Second Block: The Fairy
The second block that we will be making is The Fairy, which was an integral part of The Legend of Zelda game. The Fairy was an item that Link, our hero, could use to replenish his health or even bring himself back from death. Throughout the game, Link would battle his enemies and often lose his health, sometimes even dying to these foes. If Link came across a fairy within the land, he could use it to replenish his health fully. If Link captured a fairy and kept it in his backpack, he could bring himself back from death should he die in combat.
The Fairy will be constructed in the same manner as the first block, The Candle, however the size is different. The Fairy block grid is 9 squares across and 17 squares down and it uses the following number of 1.5 inch squares:
| Color | Usage in this Block | Squares Needed | |
| Black Kona: Black |
Background of the block | 77 | |
| Red Kona: Red |
The hair and part of the dress | 32 | |
| Yellow-Orange Kona: Cheddar |
The body of the Fairy | 30 | |
| White Kona: White |
The wings and part of the dress | 14 |
The Interfacing
The fusible interfacing is cut 13.5″ wide by 25.5 ” long and can be cut from just one piece of interfacing. It will be a rectangle that covers Blocks A1 through Q9 on our Grid. Remember to place your interfacing with the fusible side up.
Cutting Our Fabric (Using the June Tailor Shape Cut Ruler)
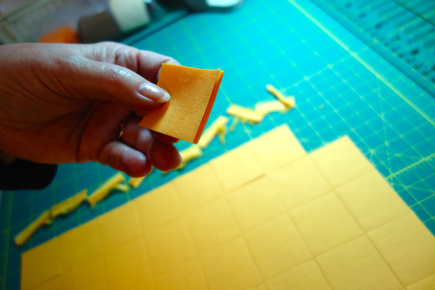
We didn’t go into details on how to use the June Tailor Shape Cut Ruler to cut our squares out for the first block as we didn’t want to overwhelm you with instructions right away, but wanted to offer you these time-saving directions below before doing any more blocks. You do not need to use the June Tailor Shape Cut Ruler or cut out your squares this way, but it will greatly speed up your process and allow you to be much more accurate in the process.
1. Cut a 12.25″ strip of fabric from the larger piece of fabric.
2. Fold your fabric in half, meeting the folded edge with the selvage edge of the fabric to fit under the “Shape Cut” ruler.
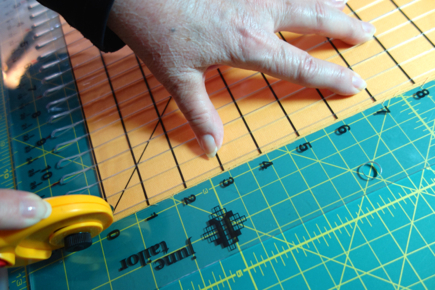
3. Center the fabric under the cutting slots so that both the left and right edges of the fabric can be trimmed.
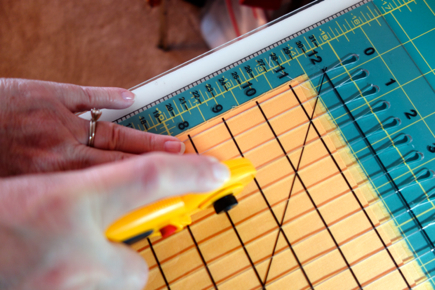
4. Starting with the first slot, cut 8 strips of fabric, each 1.5″ wide. Tip: I made marks in RED to more clearly show the 1.5″ slots on the ruler.
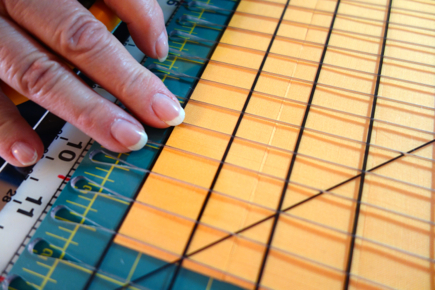
5. Pick up the ruler without moving the fabric, turn the ruler to crosscut the strips into squares. Again, lining up the first slot on the ruler on the left side of the fabric.
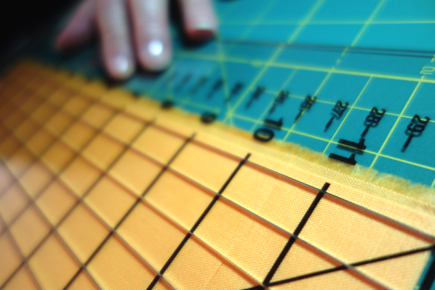
6. Trim away the edge with the selvage and folded edge. You are now ready to cut the strips into squares.
7. Cut the fabric into squares by cross cutting the previously cut strips.
I was able to make 7 crosscuts and a small leftover piece on the right side. Using this method of cutting results in 224 squares. You will need the following number of squares for this particular block:
| Color | Usage in this Block | Squares Needed | |
| Black Kona: Black |
Background of the block | 77 | |
| Red Kona: Red |
The hair and part of the dress | 32 | |
| Yellow-Orange Kona: Cheddar |
The body of the Fairy | 30 | |
| White Kona: White |
The wings and part of the dress | 14 |
Laying Out Our Fabric
To make The Fairy block, you will be placing the correct color fabric square on the fusible side of the interfacing following the pattern for The Fairy, which can be found here. The numbers and letters on your grid will correspond with the numbers and letters on each block’s pattern. You can download the pattern which contains the layout of the individual squares for The Fairy (Block 2) here.
Additional Steps
Further information and photos for these additional steps can be found within our first block’s instructions (located here at The Candle) but we included a quick recap below just for your review.
1. Press the Block: When you have finished laying out the fabric squares on the interfacing, press them with an iron following the interfacing manufacturers instructions. To press, (pressing cloth is optional) carefully place the iron on each section of the block until you have fused all the pieces in place. (Tip: I use a small travel iron for this step.)
2. Sew the Block: Fold and press the block along the seam line ,where the pieces meet, across the width of the fabric. Use a scant 1/4 inch, sew next to the fold lines you just made. Snip the seam allowance through the interfacing where the squares meet, being careful NOT TO GO THROUGH THE SEAM. Press the seam allowances for each row in alternative directions. Finally fold along the vertical rows and sew using a scant 1/4 inch.
Comments
- krislovesfabric says... March 16, 2015 | 7:45 am
I have looked at that ruler but have never used it, thanks for the tutorial on how it works 🙂 It looks to make quick work of making the squares!

Welcome to Quilting Linda
Within you'll find info about quilting, including my projects soon to be featured below, as well as tidbits about my friends & family. Enjoy!


 © 2009 Linda West