
- Mar
- 1
Zelda: The Quilt-Along — The Candle
Posted Sunday, March 1st, 2015 in Quilting | Tags:
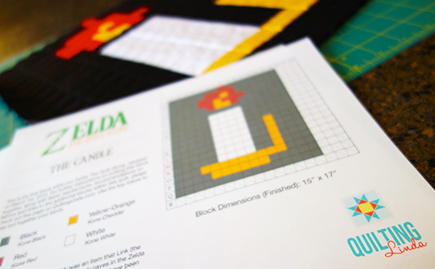
Grab your fabric and additional tools — we’re ready to make the first block of our Zelda: The Quilt-Along. We have our full list of fabric and tool requirements here, which includes yardage for fabric for the entire quilt, but for this particular block you’ll need:
Fabric & Thread Requirements
| Black Kona: Black |
White Kona: White |
||
| Yellow-Orange Kona: Cheddar |
Red Kona: Red |
||
| Interfacing Pellon 911FF |
Thread White Thread |
Tools Needed for this Block
- Pressing Iron (Recommended: Smaller, travel iron)
- June Tailor Shape Cut (Optional) or other tool(s) to cut 1.5″ squares of fabric
- OLFA Rotary Cutter
Supplies Needed for the Pressing Board & Grid
- Materials for the Pressing Board: 30″ square MDF board, cotton batting (approx. 35″ square piece), plain-colored duck cloth (approx. 35″ square), felt (approx. 30″ square – optional)
- Materials for the Grid: 29″ square light-colored duck cloth, dark permanent fabric marker (fine point)
And finally, make sure to download our complimentary pattern for The Candle:
The Pressing Board
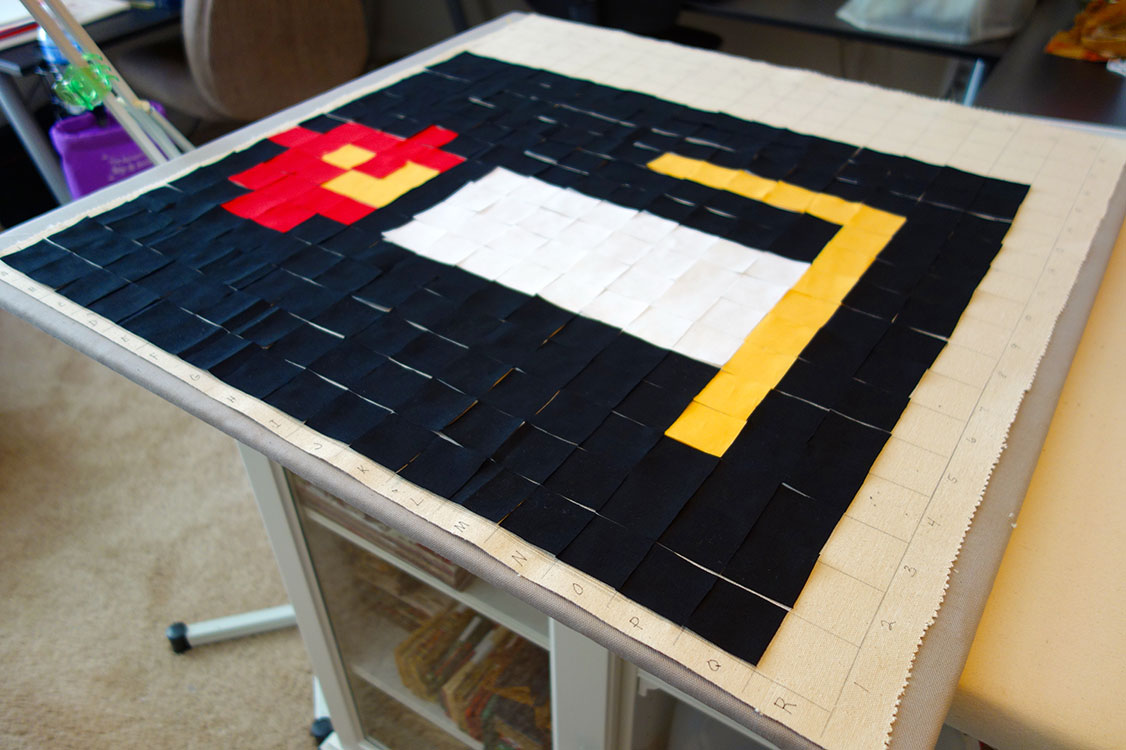
Before we start the first block, I will explain how I made my pressing board and grid. As I stated in the introduction, I had a sheet of MDF cut into smaller pieces. The size board you will need for this quilt-along is 30 inches square, which will give you enough space on either side to accommodate working with all of the blocks that we are making. I used one layer of cotton batting to cover the top and wrap around the sides, gluing the edges to the back of the board. The next step is to cut a piece of plain colored duck cloth (I used grey color) to cover the batting. Pull it taut and staple the edges to the back of the board. I covered the back of the board with felt to make it look neater and more smooth, but this is optional.
This pressing board will be useful for projects beyond our Zelda: The Quilt-Along. You can see the grey pressing board that I created within the photos below, behind the grid.
The Grid
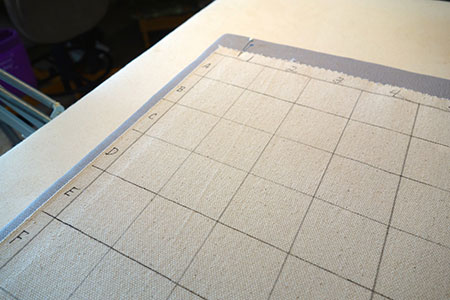
To make the grid, I cut another piece of duck cloth 29 inches square. Using a dark permanent fabric marker (fine point), draw an initial line 1/2 inch from the top edge across the entire width of the fabric. Make sure the line is dark enough to be seen through a piece of fusible interfacing. Begin drawing another line across the width of the fabric, this one exactly 1.5 inches down from your first line. Then continue drawing lines across the width of the board, exactly 1.5 inches apart until you have 18 rows.
The next step is to duplicate this process lengthwise, first drawing a line 1/2 inch from the left side of the fabric and then continuing to draw lines 1.5 inches apart lengthwise until you have a grid of 18 X 18 squares.
The final step is to number and letter the columns. I put numbers 1 – 18 across the top and bottom and letters A – R on the left and right sides of the grid. See the close-up of my grid above and behind the block we are creating in various photos below.
Our First Block: The Candle
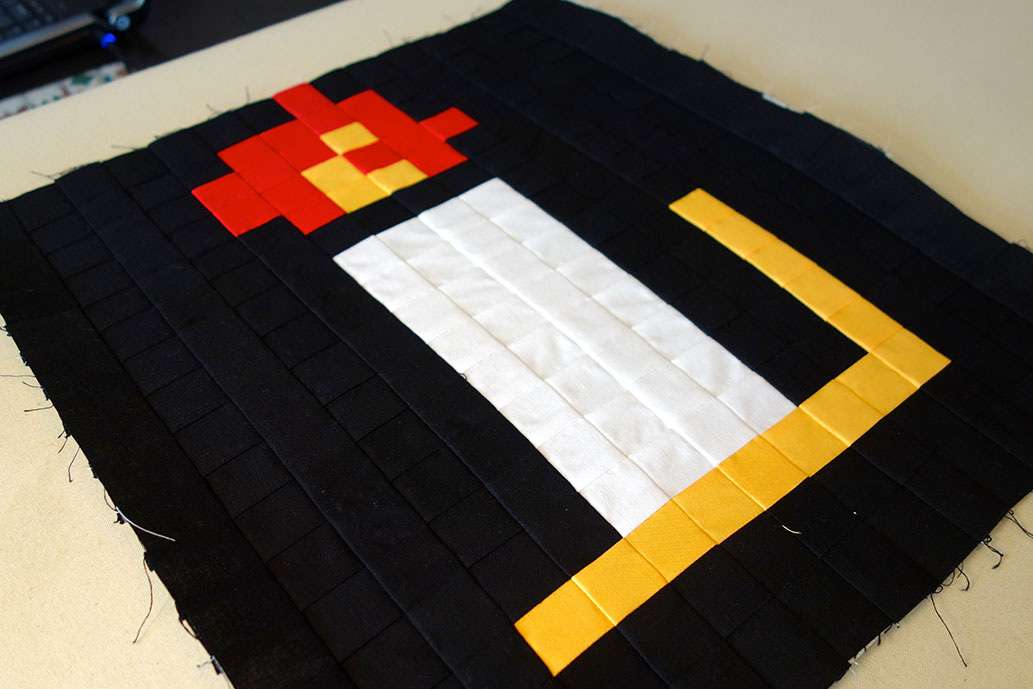
The first block we are making is The Candle, which was an item that Link (the hero of The Legend of Zelda) could use to light up dark caves in the Zelda games. While there are different Zelda games that have been created, all of the items, characters and enemies that will be included within this quilt are from the very first game: Legend of Zelda.
The Candle block grid is 15 squares across and 17 squares down and it uses the following number of 1.5 inch squares:
| Color | Usage in this Block | Squares Needed | |
| Black Kona: Black |
Background of the block | 183 | |
| White Kona: White |
The candlestick | 32 | |
| Yellow-Orange Kona: Cheddar |
The flame and candlestick holder | 24 | |
| Red Kona: Red |
The flame | 16 |
The Interfacing
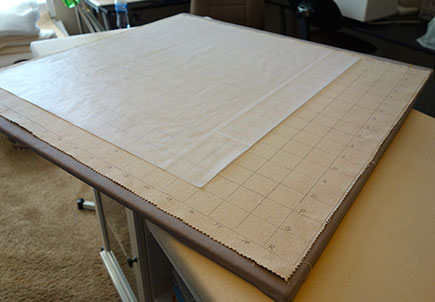
To start a block you will place the plain fusible interfacing on top of the grid with the fusible side facing up. We will be using Pellon 911FF for our interfacing. Please refer back to our list of required fabrics and tools here for further information. Because the width of the Pellon 911FF interfacing is 20 inches wide you will have to use more than one piece for the most of our blocks. Follow the instructions below to cut and layout the interfacing in this manner.
1. Cut two (2) pieces of interfacing that are 25.5 inches long x 20 inches wide.
2. Place one (1) piece you just cut on top of the grid with the the edges even with the upper left and left side of the grid with the fusible side facing up.
3. The width of our first block, The Candle, is 15 squares or 22.5 inches. From the second piece of 25.5 inches long of interfacing (from step 1), cut a piece 2.5 inches wide.
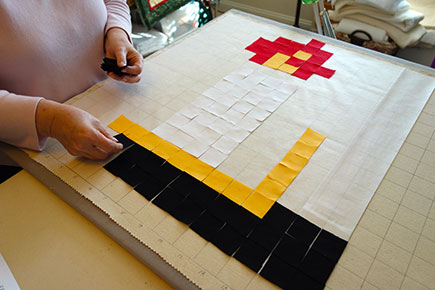
4. Place this second piece next to the first piece on the grid, fusible side up, with edges meeting. The interfacing should now be covering the squares as shown in the photo above.
Save the leftover piece of interfacing to be used in our next block.
Cutting Our Fabric
Now we are ready to start cutting the fabric into 1.5 inch squares. You may use any method you choose but I used my June Tailor Shape Cut to more quickly and accurately cut my fabric. I first cut my fabric into 1.5 inches strips and then turned my June Tailor Shape Cut to cross-cut the strips into squares. (Tip: I marked lines with a red Sharpie on my Shape Cut to help me find the correct slot to cut 1.5 inch squares) Remember, you will need to cut the following number of squares out of each respective fabric:
| Color | Squares Needed | |
| Black Kona: Black |
183 | |
| White Kona: White |
32 | |
| Yellow-Orange Kona: Cheddar |
24 | |
| Red Kona: Red |
16 |
Laying Out Our Fabric
We are now ready to start working on The Candle block. For this and every block, you will be placing the correct color fabric square on the fusible side of the interfacing following the pattern for that individual block. The numbers and letters on your grid will correspond with the numbers and letters on each block’s pattern. You can download the pattern which contains the layout of the individual squares for The Candle (Block 1) here.
Pressing the Block
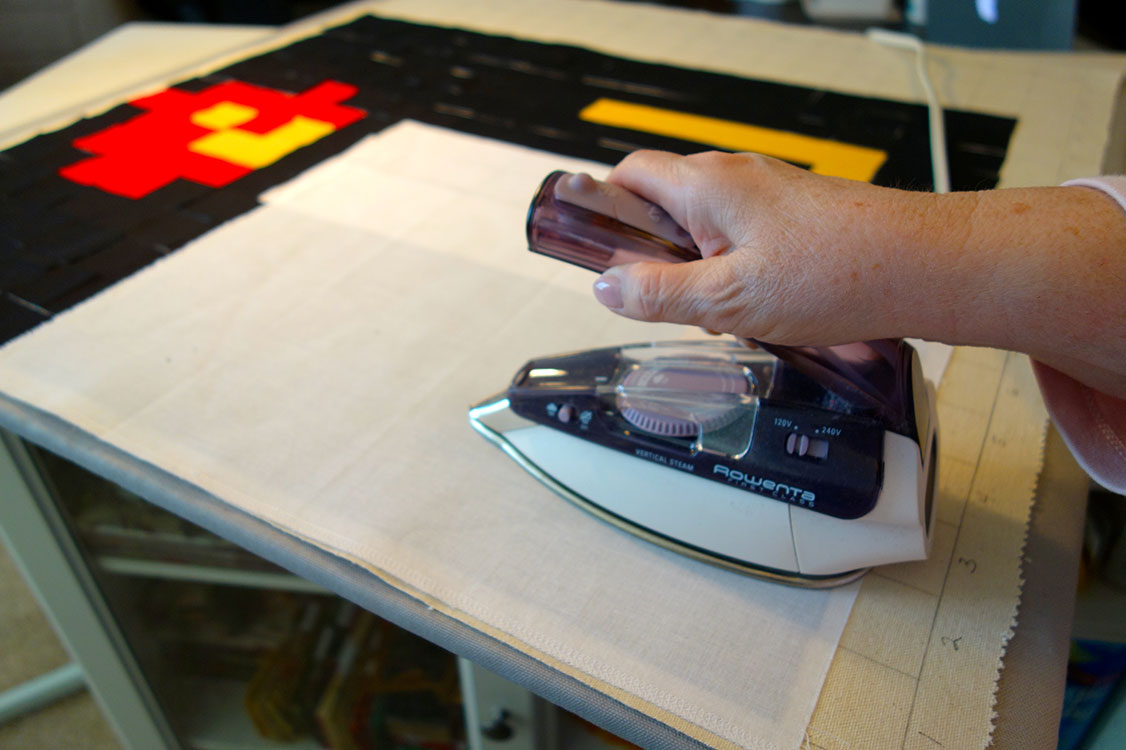
When you have finished laying out the fabric squares on the interfacing, press them with an iron following the interfacing manufactures instructions. To press, (pressing cloth is optional) carefully place the iron on each section of the block until you have fused all the pieces in place. (Tip: I use a small travel iron for this step.)
Sewing the Block
Now on to our last step, the sewing of the block.
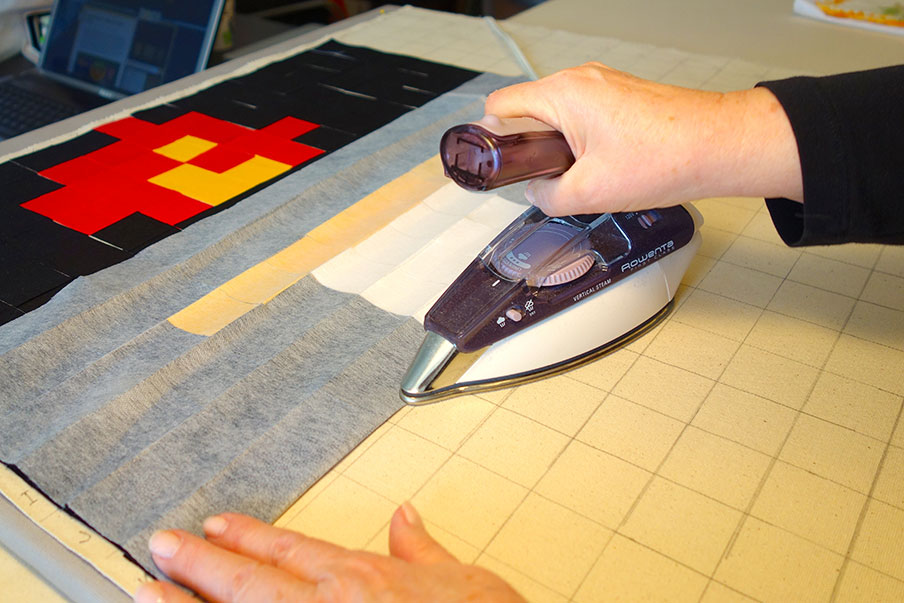
1. Fold the block along the line where the pieces meet, starting at the top or bottom. Then press this fold to remove some of the bulk due to folding the interfacing as is shown in the photo above. (Tip: To speed the process, I will press all the fold lines across the block before sitting down to sew.)
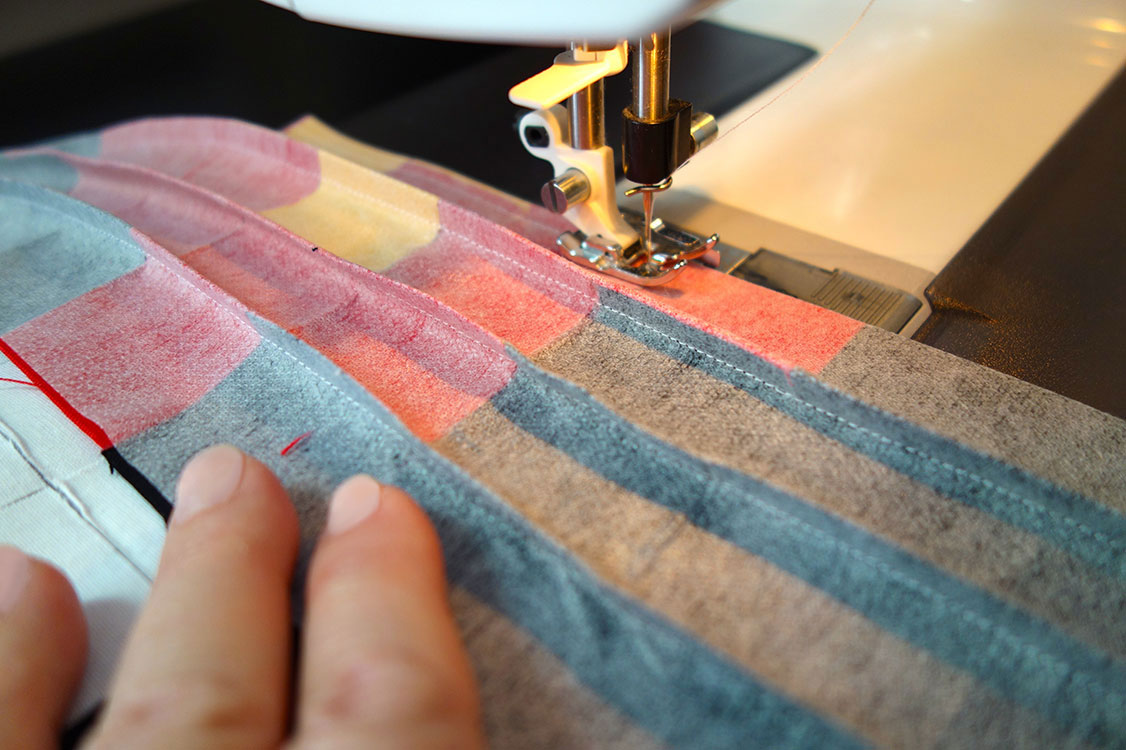
2. Using a scant 1/4 inch seam, sew along the fold line as is shown in the image above. (Tip: I used white thread so it would not shadow through on the white candle.) Repeat this until all the crosswise seams are sewn. Once this step is completed, your block will appear shorter and wider than your finished block will be finished.
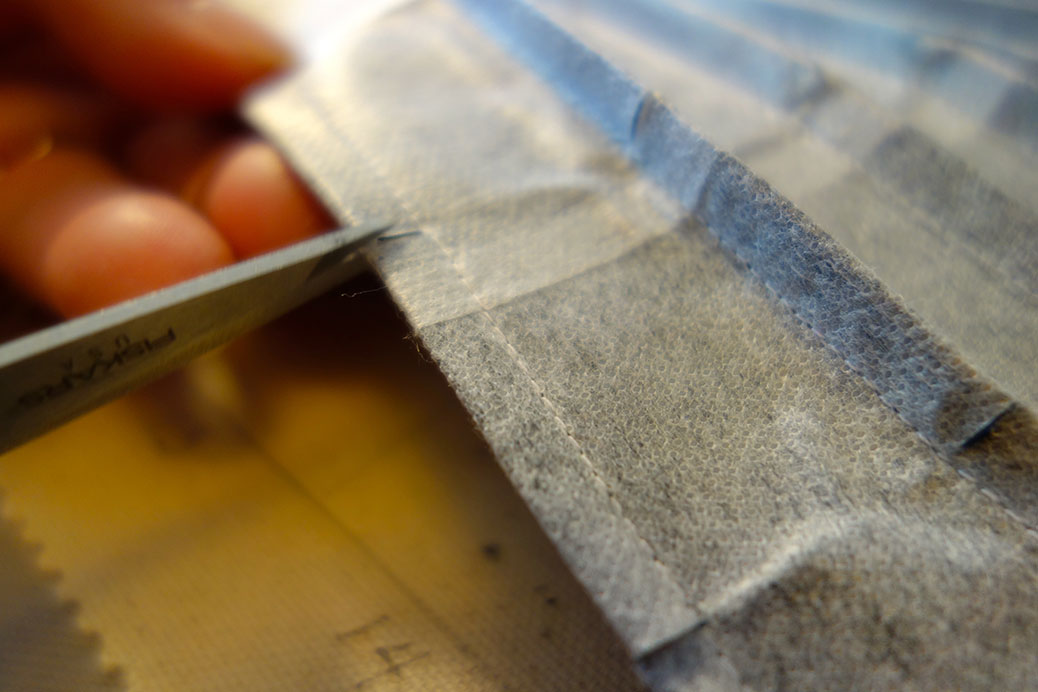
3. Our next step is to snip the seam allowance, through the interfacing where the squares meet, being careful NOT to go through the seam. This will make it possible for our next step of pressing the seam allowances. Review the image above for a visual of where to snip.
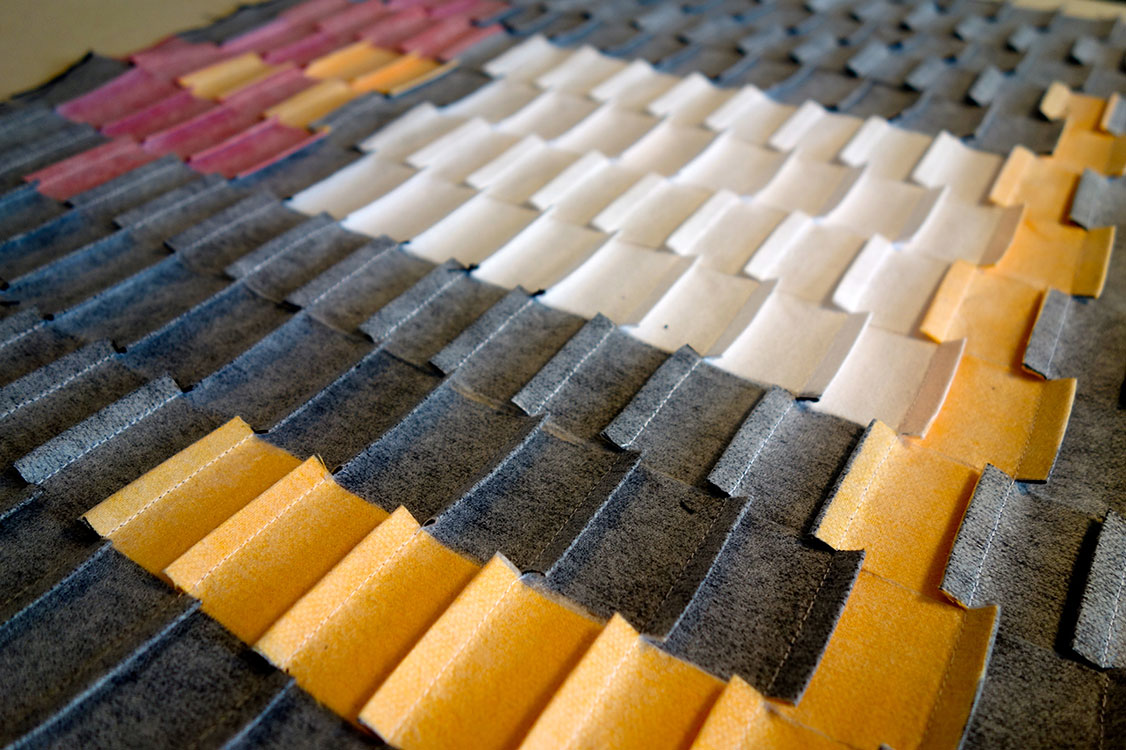
4. Press the seam allowances in alternating directions. You can see each row within the photo below alternating the direction.
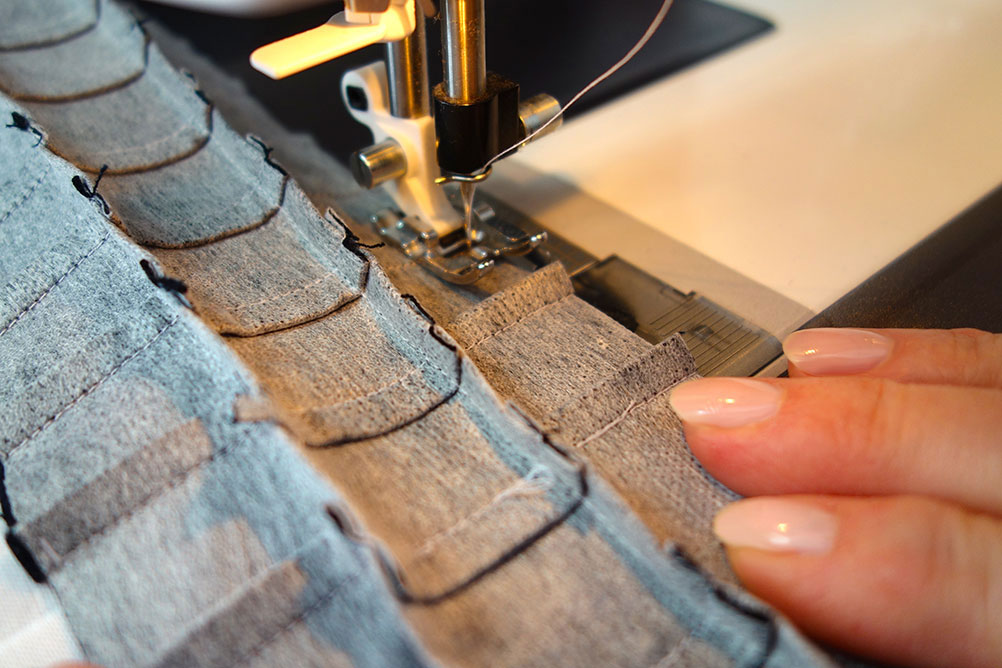
5. Fold along the vertical rows and sew as in the example above.
Congratulations! You’ve now completed your very first block in Zelda: The Quilt-Along. Please join us again on March 15th for our second block: The Fairy.
Comments
- Josie says... January 17, 2017 | 5:17 pm
Thank you so much for this amazing pattern. I am using it to make a quilt with my son and we are having a blast! Here is a link about our progress on my blog if you are interested. http://sewitsnothingextraordinary.blogspot.com/2017/01/legend-of-zelda-quilt.html

Welcome to Quilting Linda
Within you'll find info about quilting, including my projects soon to be featured below, as well as tidbits about my friends & family. Enjoy!



 © 2009 Linda West